⚔ How Bon Fights — Combat Flow

⚔ How Bon D. Age Fights — Combat Flow Your Turn Track These See card library for full tracking. Key Rulings & Decisions • 1 Rage? bonus action 3/long rest Bear Totem: resist ALL damage types except psychic. Effective ~428 HP against non-psychic damage when raging. Rage early in hard fights. This is your most important defensive tool. • 2 Choose Battle Mode for this turn Ironwall — defensive anchor, absorb damage for the crew · Chainmaster — chain control and positioning · Crewguard — protect specific allies • 3 Move (80ft walk/swim) • 4 Flying Strike — 25ft leap, Impact Core ALWAYS triggers 1/SR (2/SR post-timeskip) Impact Core always triggers on Flying Strike — intentional design. Viktor built the Impact Core for a shipwright who fights by closing distance. Flying Strike always meets the 10ft movement requirement (requires 25ft leap). • 5 Attack with Tidebreaker Maul action • 6 Chain Feed System (Mod 04) — Extend / Pull / Reel bonus action, 1/turn OR use Bonus Action for Healing Word / Bardic support. You cannot do both in the same turn. • Rage uses Bear Totem 3/LR • Flying Strike 1/SR pre-TS · 2/SR post-TS

🌀 Haki

>Haki Armament — Stage 1 Awakened · Pulses: 0 / 8 Your attacks count as magical. +1 to ATK and DMG rolls. Manifests as raw physical reinforcement — strongest in moments of protecting the crew or ship. Next stage unlocks: first major New World arc + 8 pulses. <div class="section-title"

📋 Your Rules

See character sheet for ruling details.

🃏 Cards — Click to View Full Size

13 cards · click any to expand

Ironwake Rig — Base ArmorIronwake Rig — Base Armor
Mod 01 — Auto-Brace PistonsMod 01 — Auto-Brace Pistons
Mod 02 — Anchor Lock SystemMod 02 — Anchor Lock System
Mod 03 — Distributed Load FrameMod 03 — Distributed Load Frame
Mod 04 — Chain Feed SystemMod 04 — Chain Feed System
Mod 05 — Quick-Lock HarnessMod 05 — Quick-Lock Harness
Crewguard ModeCrewguard Mode
Ironwall ModeIronwall Mode
Breakwave ModeBreakwave Mode
Chainmaster ModeChainmaster Mode
Tidebreaker MaulTidebreaker Maul
Bon the Unsinkable — TimeskipBon the Unsinkable — Timeskip
Bon — The Iron Tide ReferenceBon — The Iron Tide Reference
Bon — Iron Tide Training ArcBon — Iron Tide Training Arc

🛡 Gear — Current Loadout

See gear details.

⚙ Gear & Abilities

>Gear & Abilities Tidebreaker Maul — Legendary Heavy two-handed weapon. See weapon card for full stats. Folding Haft mod required to stow it at all (1 minute). Module 05 (Quick-Lock Harness) reduces stow/deploy to a Bonus Action once Folding Haft is installed. Ironwake Rig — Modular Armor Mod 01 — Auto-Brace Pistons: Reaction bracing, damage reduction on triggered hits. Mod 02 — Anchor Lock System: Lock position, become immovable, enables Chainmaster mode. Mod 03 — Distributed Load Frame: Structural support, enables crew protection stances. Mod 04 — Chain Feed System (Bonus Action, 1/turn): Extend / Pull / Reel. Combos: Breakwave Mode (04+05) and Chainmaster Mode (02+04). Mod 05 — Quick-Lock Harness: Stow/deploy Maul as Bonus Action (requires Folding Haft installed). Ironwake Rig does NOT count as heavy armor. Flying Strike — 1/SR (2/SR post-timeskip) 25 ft leap attack. Uses STR for ATK and DMG rolls. Normal range 30 ft, long range 120 ft, same damage as weapon. Impact Core always triggers on Flying Strike — this is intentional. The leap always meets the 10 ft movement requirement. Combat Modes Ironwall: Defensive stance, protect crew. Crewguard: Guard allies, intercept attacks. Chainmaster (02+04): Anchor + Chain Feed combined control. Breakwave (04+05): Chain Feed + Quick-Lock combined mobility. Bear Totem Rage While raging: Resistance to all damage except psychic . +STR mod to damage. Cannot be cast on or charmed. 3 rages per Long Rest. 6,000 lbs lifting capacity. Bard Spells — Key Healing Word (BA), Cure Wounds, Thunderwave, Heat Metal, Knock. 2 Bardic Inspiration per Long Rest (d8). Smokey D. Ass — Companion Bard 3, CHA 19, Spotlight Charges 2/LR. Controlled by you. Gag Check d6 on meaningful actions. Hard-capped at Bard 3 forever. See Smokey's card for full ability list. Card Library Ironwake Rig — Base Armor Mod 01 — Auto-Brace Pistons Mod 02 — Anchor Lock System Mod 03 — Distributed Load Frame Mod 04 — Chain Feed System Mod 05 — Quick-Lock Harness Crewguard

⚓ Ship Role — Shipwright

⚓ Ship Role — Shipwright Crew Role: Shipwright Role Ability — Ship Building, Upgrading, and Repairing: You can build, upgrade, and repair the Miku. In combat, the relevant ability is Ship Repair: STR check DC 15 as your action. On success, restore 1d6 + STR modifier HP to any one chosen component. You have Advantage on this check — you built her and you know where every joint is. If a component is at 0 HP and isn't the hull, successful repair makes it functional again. Component repair priority (lowest HP first): Helm (38 HP) → Dial Upgrade (30 HP) → Carronade (40 HP) → Harpoon Cannon (50 HP). The Helm is the most critical — if it goes down the Miku cannot turn. Your Role in Naval Combat Station: Below decks — engine room and structural systems. You are the reason the Miku stays operational when things go wrong. What you do each round: Monitor component HP. When any component takes damage, evaluate whether to repair it this round or let it ride. The Huge Fuel Engine requires your attention — if it goes dry or takes damage, the Paddle-Wheel, Beam Cannon, and Rocket Booster all cease to function. You track fuel. You manage the engine. Nobody else knows the systems like you do. The Miku's build failures: Several components have "attacks against this component have advantage" from construction under time pressure. The Carronade has an Exposed Weak Point — enemies who know about it will target it. You know where these weaknesses are. If you see an enemy consistently targeting one component, call it out to the crew. Post-combat: You lead all repair work after every naval engagement. Viktor and Anisa from the workshop can assist your checks (+1 to +5 bonus depending on how many help). What to prepare before a naval engagement: Check fuel levels — the Huge Fuel Engine needs a full barrel per day Know current HP of every component before the fight starts Get below decks immediately at the start of combat — repairs are your action If the Helm takes any damage, that is your im

🎭 Bon At The Table — Role & Identity

🎭 Bon D. Age At The Table — Role & Identity Bon built the Shipsune Miku. That context matters in combat — his instinct is always to protect, not just to hit. With Bear Totem Rage active he is functionally the most durable frontline in the crew: 214 HP plus resistance to all damage types except psychic equates to roughly 428 effective HP against non-psychic damage. He opens Rage, closes distance with Flying Strike, and then becomes the wall the crew operates behind. The Ironwake Rig is not heavy armor — there is no disadvantage clause. What To Expect At The Table ◆ Rage early. Bear Totem resistance is irreplaceable and the BA cost is non-negotiable on hard fights. Don't save it. ◆ Flying Strike always meets the Impact Core 10ft movement requirement — it always triggers. This is intentional design. Don't hesitate. ◆ Module selection happens before combat — modules cannot be swapped mid-fight. Choose deliberately based on expected encounter type. ◆ Chain Feed BA vs Healing Word BA — pick based on what the battlefield needs most. You cannot do both in the same turn.

📖 Timeskip Arc

The Iron Anchor Oath

He came up out of the water alone.

The Graveyard Docks didn't announce themselves. They appeared through the surface as he swam — first the shadow of rusted hulls, then the shapes of ships that had died in every possible way: fire, storm, cannon, time. An island built of them, layered over decades, the sea turning wreckage to geography. He hauled himself onto the nearest hull, looked around at the field of broken things, and made a decision immediately.

He would learn from every single one of them.

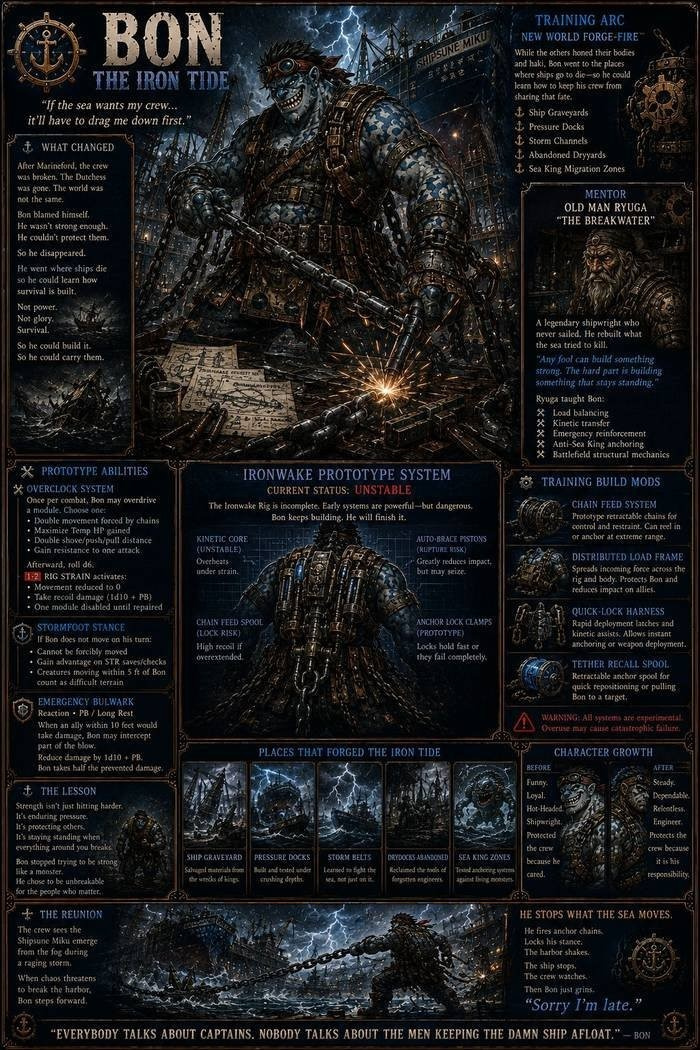
Old Man Ryuga — "The Breakwater" — found him on the second day, not because he was looking but because he heard the sound of Bon pulling iron off a wreck and wanted to know who was making that particular racket this far from anywhere.

"You're going to cut yourself," Ryuga said.

"Probably," Bon agreed.

Ryuga watched him work for another hour. Then he said, "You're doing it wrong. Every part of it." He picked up a pry bar, showed Bon the angle. "Load follows grain. You don't pull iron. You read where it wants to come from and you take it from there."

That was the beginning.

Ryuga had rebuilt things for fifty years — ships the sea tried to kill, hulls held together by stubbornness and structural principle, vessels that should have been lost and weren't because someone understood load distribution at a fundamental level. He had never sailed. He taught from a place that had no romance in it, only mechanics, only the question of whether a thing would hold under the force it would be asked to bear.

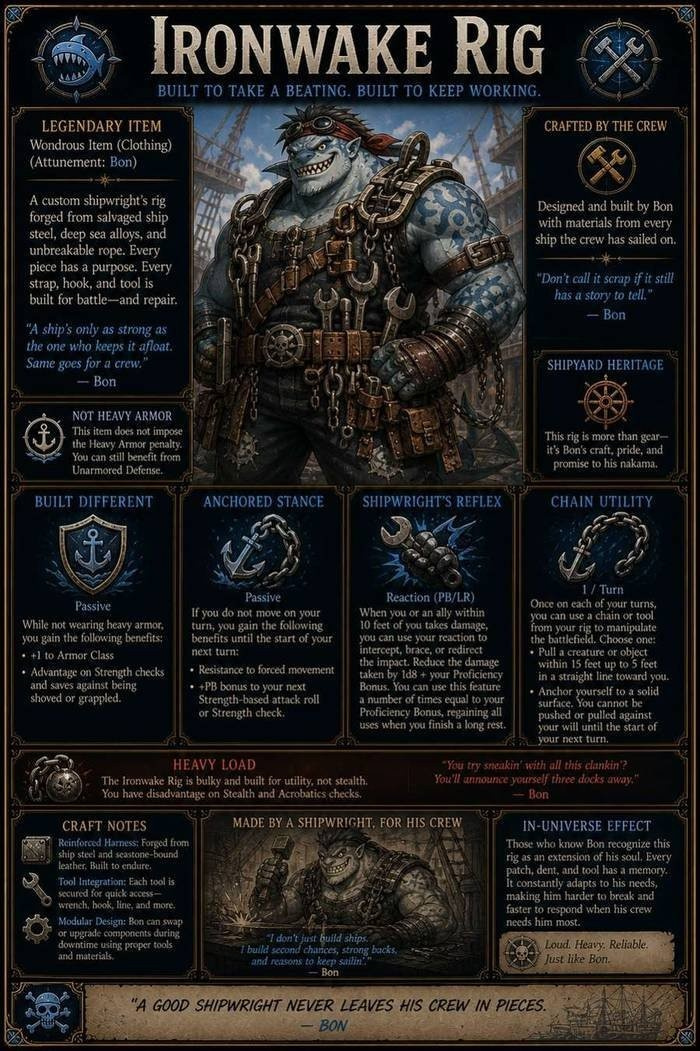
The Ironwake Rig, at the start of month one, was salvage. It had held at Marineford. It had not been enough. Every morning Bon looked at what he'd built and catalogued what had failed and why, and the list was honest and ugly.

He had been too slow. The Miku had been outrun. Rokuji had gone under while the ship he'd built watched.

He didn't talk about this with Ryuga. He didn't have to.

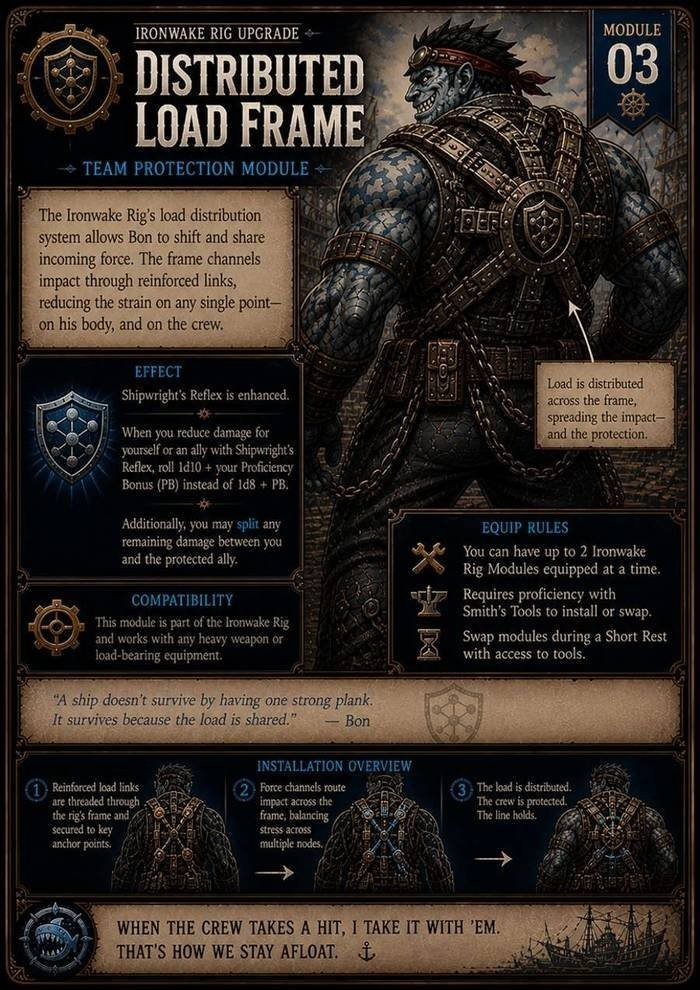
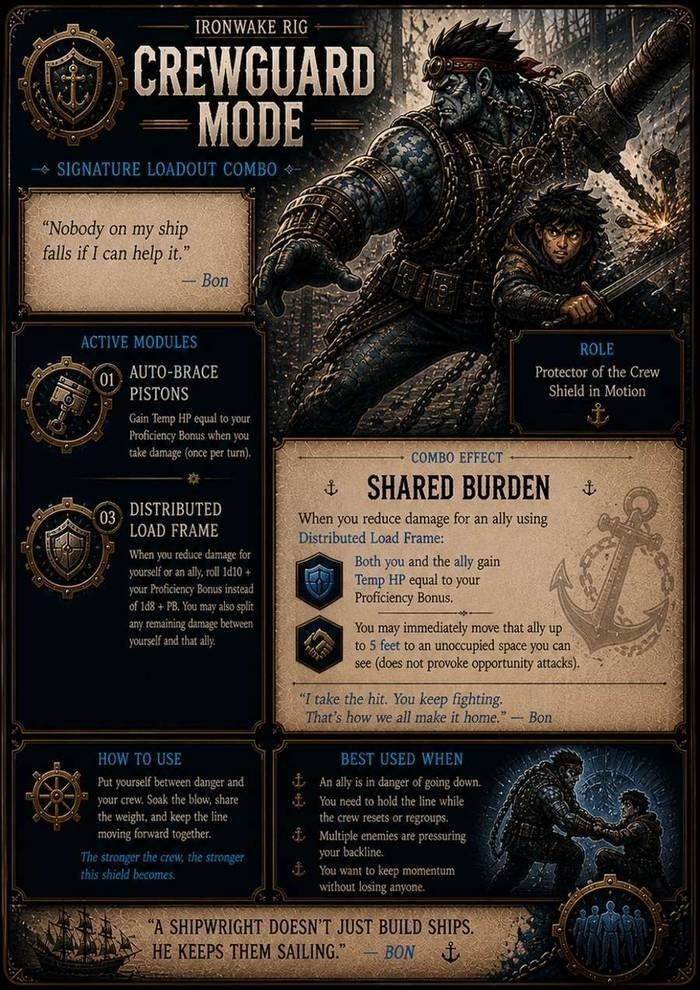
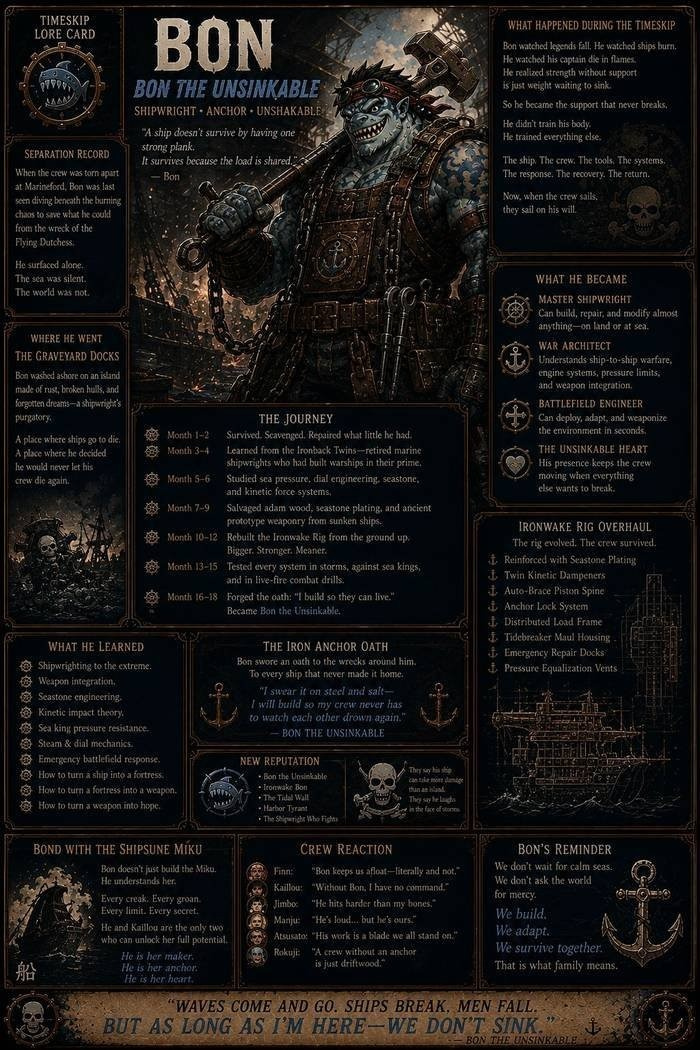
Month three: load balancing. The frame of the Rig restructured to distribute impact across multiple anchor points rather than concentrating it at the strongest sections. "A ship doesn't survive by having one strong plank," Ryuga told him. "It survives because the load is shared." Month six: kinetic transfer — learning to convert incoming force through the frame rather than simply absorbing it. 
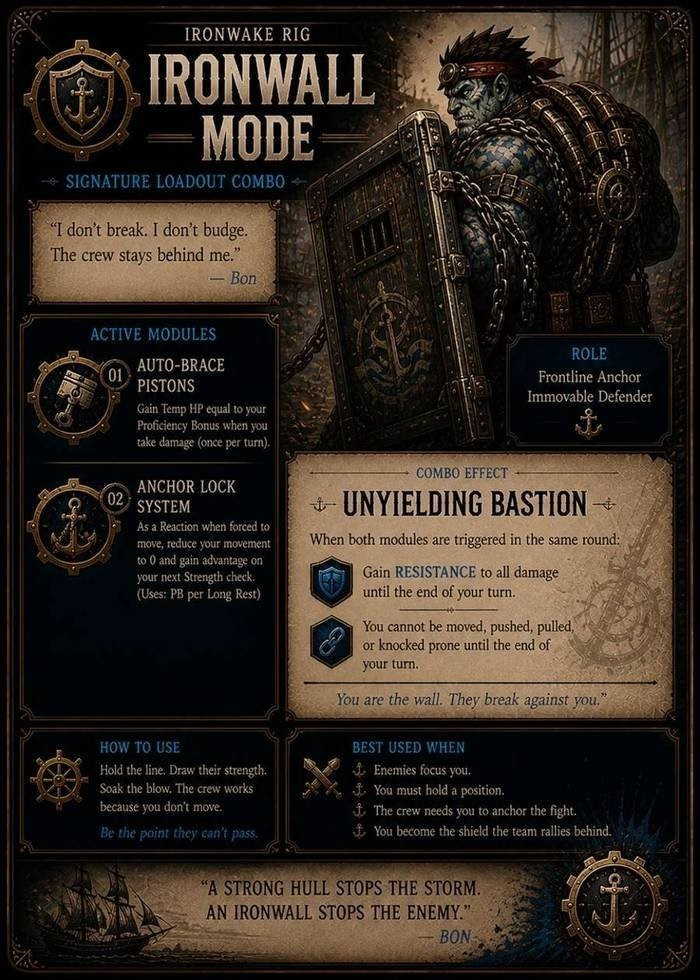
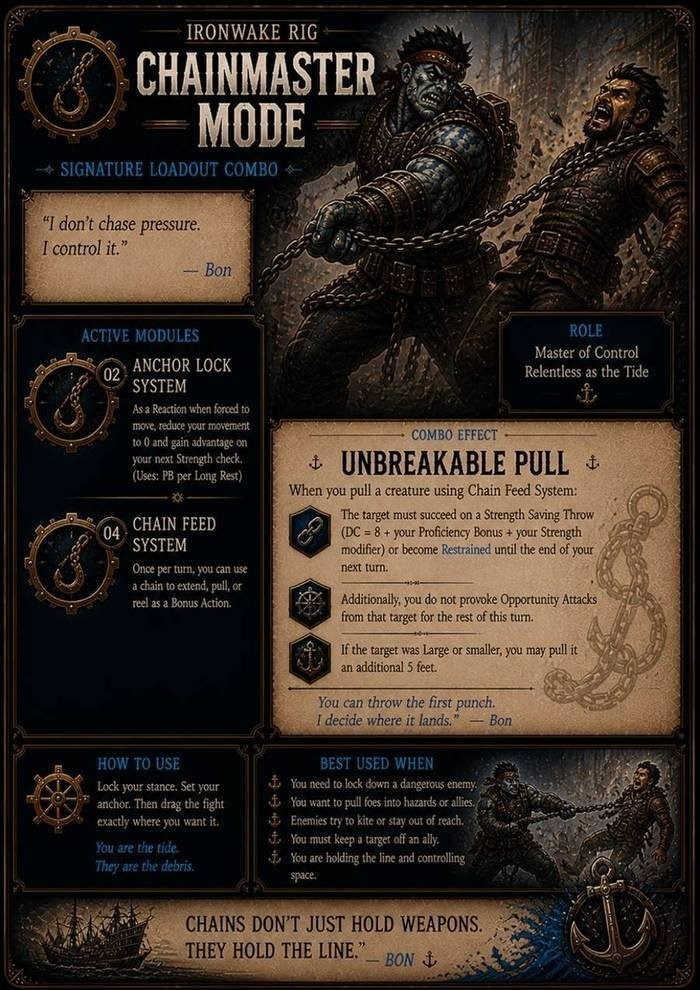
Month nine: seastone plating, harvested from wrecks where marines had used it for hull reinforcement, repurposed as armor lining. Month twelve: anti-Sea King anchoring theory, practiced against the actual sea kings that moved through the Graveyard at depth, testing the chains to failure and rebuilding them stronger after.

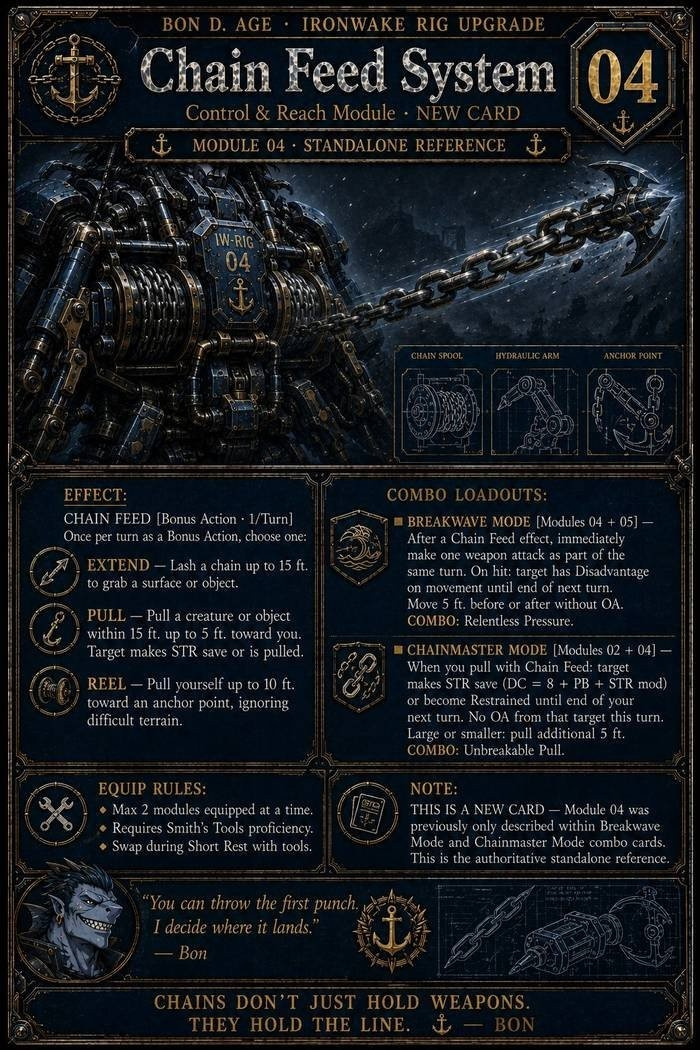
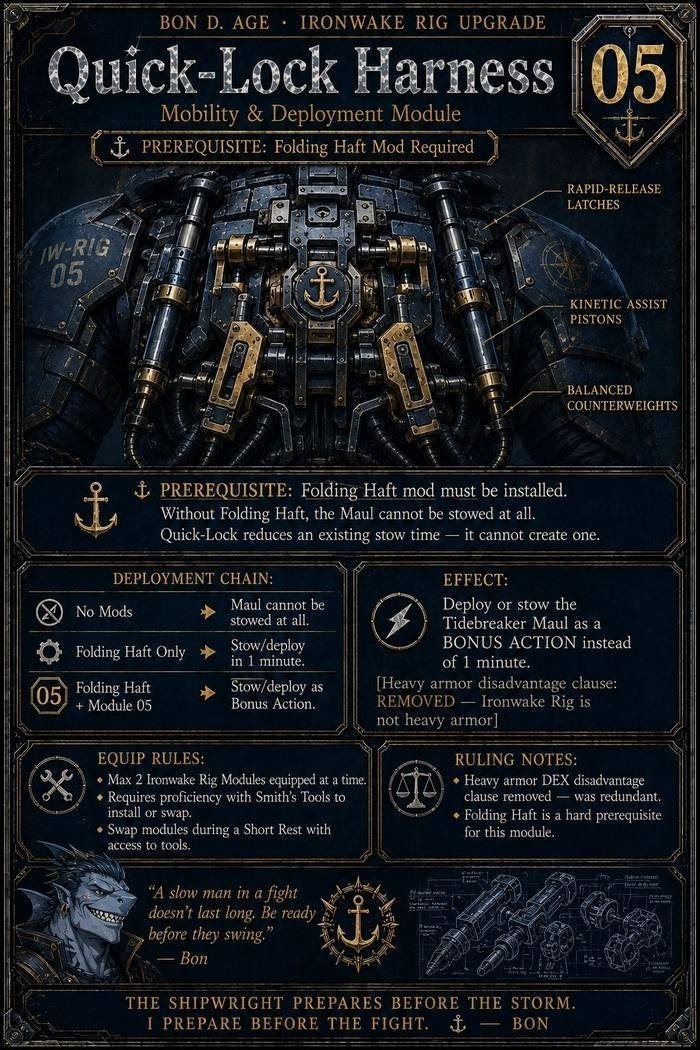
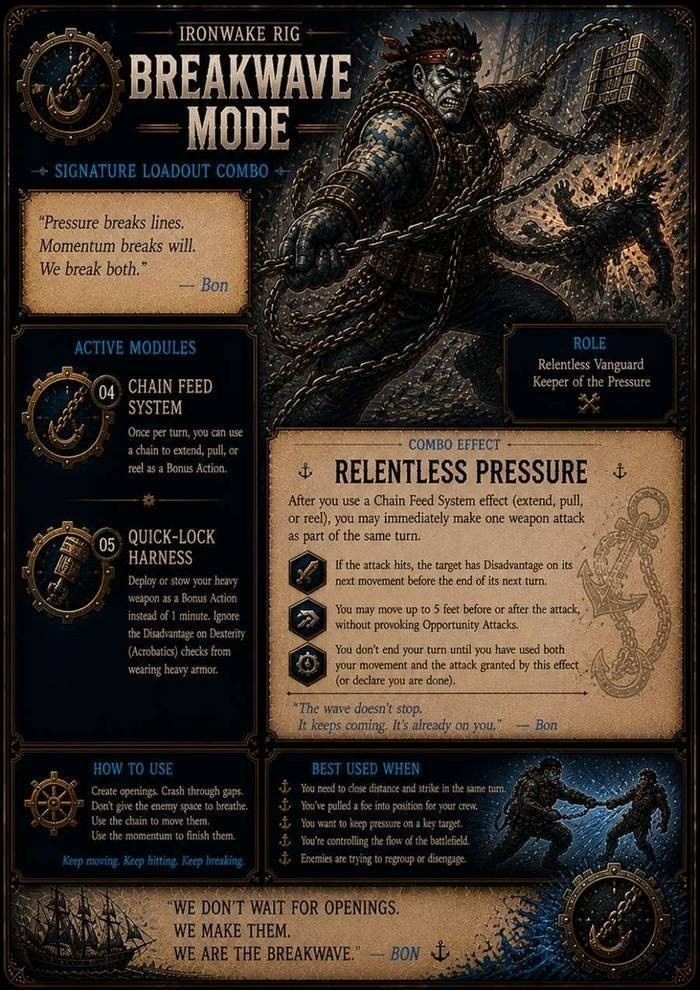
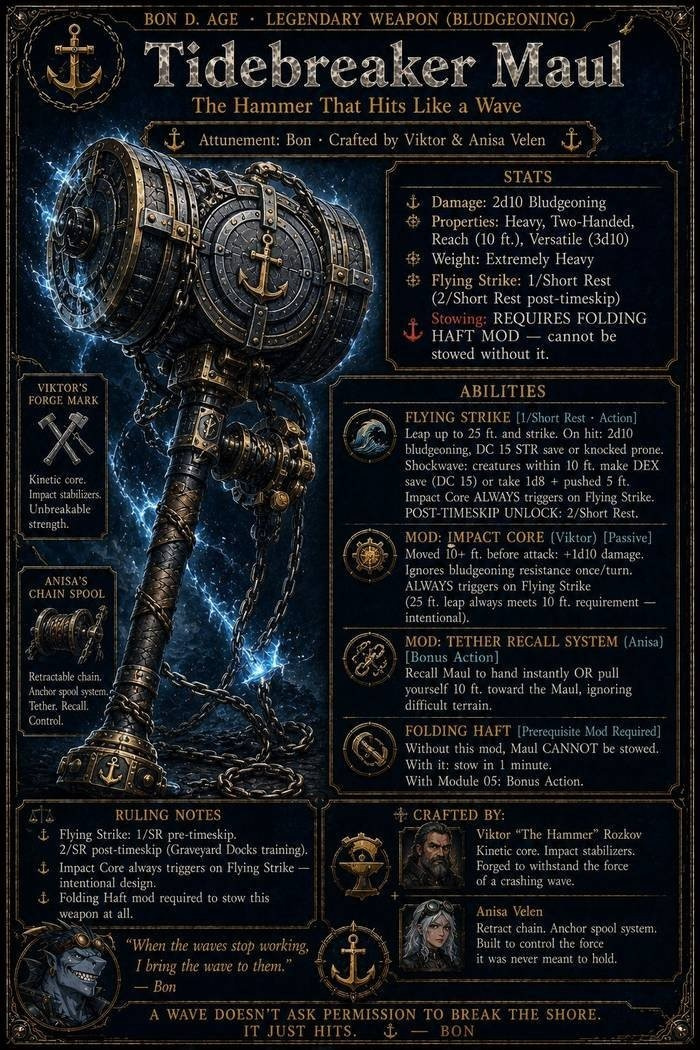
The rebuilt Tidebreaker Maul housing came at month fifteen. Ryuga said nothing about it being a weapon. He said it was a structural problem and they solved it structurally — a folding haft design, quick-lock mechanism, balance distribution that made something the size of a ship's capstan manageable for one person with the right frame support.

Month sixteen. Ryuga handed him a piece of iron salvaged from the deepest wreck in the Docks — something old, older than anything either of them could identify. No markings. Just density and the particular weight of things that had survived a very long time at depth.

"Make something worth swearing on," Ryuga said.

Bon spent two days. The result was the anchor — not decorative, real, functional, small enough to hold in a fist. He stood at the edge of the Docks in the dark, surrounded by the wrecks of a hundred ships, and said it out loud.

"I swear it on steel and salt — I will build so my crew never has to watch each other drown again."

Ryuga, somewhere behind him in the dark, said nothing. That was sufficient.

Month eighteen. The Rig was rebuilt from the ground up. Seastone lining. Kinetic dampeners at every joint. The chain systems integrated, the maul housing operational, Emergency Patchwork capability wired through the entire frame. It weighed more than it had before. He was faster in it.

He left without ceremony. Ryuga was already working on something else when he walked to the water's edge.

"Come back if you break it," Ryuga called after him.

"I won't break it," Bon said.

He heard the old man laugh — once, short. That was the closest Ryuga ever came to a compliment.

He swam out and started finding his way back toward where he knew the crew would eventually be. The load, he had learned, was the point. You didn't survive by being strong enough to carry it alone. You survived by being strong enough to make sure no one had to.

---